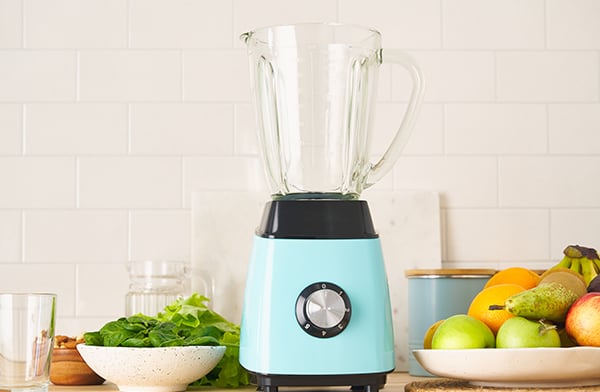
8 Tips & Tricks to Clean Your Smoothie Blender Faster

When you’re as big a fan of the health benefits drinking smoothies gives you as I am, your smoothie blender gets a daily workout. Unfortunately, that workout means you’re in an almost constant state of cleaning up your blender.
And if you’re like me, you usually find a frothy residue left on the inside of your blender. That’s the insoluble fiber usually found in the skin of fruits and fibers. Leafy greens like kale, apples, and tomatoes all tend to leave this residue, and not all of it rinses easily away.
Especially if it has a chance to sit and get, well, I believe the technical term is “cruddy.” Not only do you find this on the inside of your smoothie blender, but it’s also likely to make its way onto the base of the blender and even in the little nooks and crannies of your machine.
And while we think of our blenders as machines that help us get and stay healthy, if they’re not properly cleaned, they can also become a breeding ground for nasty bugs and even salmonella and E. coli. That’s because the bottom of your blender can tend to trap leftover liquid over time.
So, clearly, properly cleaning your blender is an important part of your health journey and should be taken seriously. Putting your blender in the dishwasher can take up quite a bit of room, and repeated dishwashing can cause the blades to become dull and the blender jug to be etched and scratched.
Even if your blender has a self-cleaning setting, it isn’t enough to thoroughly clean your blender every time. Most self-cleaning modes just don’t run long enough to sanitize properly. It takes a little while for the soap and water to foam enough to fill the whole blender jar, and if the self-cleaner doesn’t run long enough, the bottom of your blender jug will be cleaner than the top.
You can add more water to help get the lid cleaner, except that that runs the risk of water and soap overflowing your blender toward the end of the self-clean cycle as they foam up.
The self-clean mode often isn’t good at cleaning the corners of the lid or getting food particles out of the seal between the lid and the jar. It also may not clean the bends and ridges in your blender jug.
I still think getting a smoothie blender with a self-cleaning setting is useful, as long as you think of it as more of a quick clean than the deeper clean your machine needs.
Here are eight tips and tricks for how to not only clean your smoothie blender but do it faster!
Dish Soap to the Rescue
This trick is one of my favorite tips because it’s not only fast, but it’s also elbow-grease free. Fill half your dirty blender jar with warm water, and then add a few drops of dish soap. Make sure to put the lid on tight and then turn the machine on for several seconds.
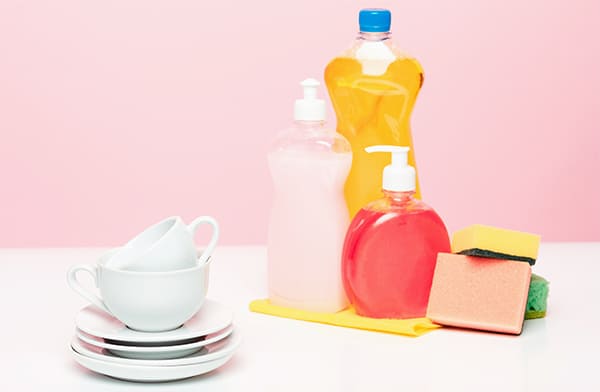
The soapy water will swish around the blender faster than you can do it by hand and take care of any leftover smoothie ingredients. Then, dump the water and rinse thoroughly.
Baking Soda and White Vinegar
I remember my grandmother talking about cleaning with baking soda and white vinegar back in the day. Then, all these modern cleaning products hit the market, and most of us turned our noses up at the idea of using “old-fashioned” cleaners.
We put the baking soda in the baking cupboard and the white vinegar in the pantry for use when we’re cooking or baking. But many of us are starting to recognize the health hazards that modern cleaners bring and remember that our grandmothers knew a thing or two.
Whether she knew it or not, when Grandma mixed her baking soda with white vinegar, she was making something new. This new mixture quickly foams up with carbon dioxide gas, and boy, does it clean!
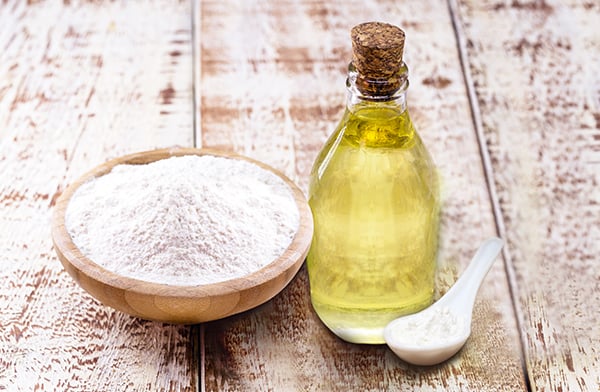
If your blender isn’t clean after using just warm water and dish soap, the next step is to clean it with a blend of hot water, baking soda, and a quarter cup of white vinegar. Put the jug back onto the blender base and run it for several seconds.
Dump the mixture out and fill the jug with warm water and dish soap. Let the blender run for a few minutes, dump, and rinse thoroughly.
Give a Little Time
Some stains are stubborn and refuse to be cleaned away with any mixture of dish soap, baking soda, white vinegar, and hot water. If your jug is still stained, use the same cocktail and soak it overnight.
Put a few drops of dish soap, half a cup of baking soda, and one cup of white vinegar into the blender jar. The baking soda will cause the mixture to bubble up and when that calms down, turn the blender on for a few seconds to make sure everything’s mixed.

Now let this do the hard work while you serial watch a show on Netflix or go to bed for the night. After the show(s) or in the morning, empty the jar and rinse it thoroughly. If the jar still smells of vinegar and baking soda after rinsing it thoroughly, add a few more drops of dish soap and warm water to the jar and run the blender for several seconds.
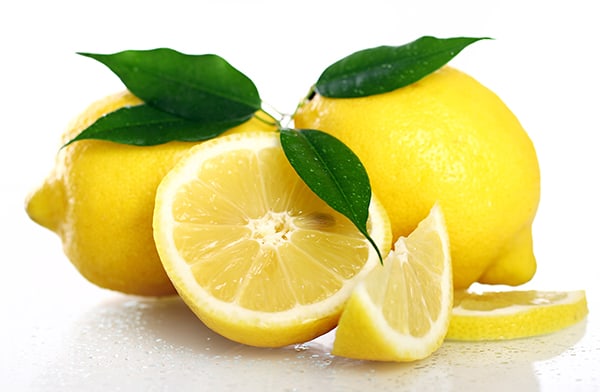
Lemons Aren’t Just for Lemonade
For blenders that use plastic rather than a glass jar, you can sometimes get a taste or smell from the plastic. An easy way to remove any lasting unpleasant taste or smell is to chop up a lemon and put it into your blender. Fill the blender jar halfway up with warm water and a few drops of dish soap, and turn the blender on for a minute or two.
Do this regularly to keep a nice, fresh smell in your blender.
Please make sure the lid is securely fitted onto the blender jar before turning the blender on for any of the tips listed above. This should go without saying, but I can’t honestly say that my kitchen has never been unexpectedly soaked with a cleaning solution or two.
Cloudy Days
Does your blender jar look “cloudy,” even after all this care and attention? Minerals from fruits and vegetables can sometimes cause a film on your jar. It’s not that the jar isn’t clean; it’s just that it doesn’t look crystal clear like it once did.
Baking soda can help with this as well. Make a paste of baking soda and water that’s thin enough to be spreadable but not so thick that it will stick to the inside of the jar without dripping down the sides.
Spread the paste on the inside of the jar in an even coat and let it sit for about 30 minutes. Once the timer goes off, use a scrub pad to scrub the container. Work in small sections and take your time as the film can be hard to remove.
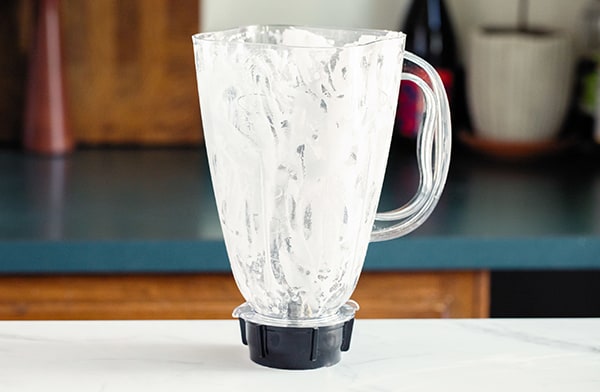
Once you’re satisfied with the clarity of the jar, rinse the paste out thoroughly to get rid of all the baking soda. If, after all this, you still see some cloudiness, fill the jar with a cup of white vinegar and hot water. Now let this sit and soak for several hours or overnight.
In the morning, you should see a clear jar. Rinse thoroughly and make your morning smoothie.
Note: I haven’t tried this, but toothpaste works well to clean clear plastic surfaces. Use white, non-gel toothpaste and, in small circular motions, rub the paste into the hazy plastic surface. Wipe the toothpaste off with a damp clean cloth, and you should be left with a clear plastic jar.
How to Dry Right
You can let your blender jar air dry upside down on a dish rack. Or, if you’re in a hurry to put the blender away, you can dry it with a clean dishtowel.
Just make sure to dry the inside before you put the lid back. A damp interior can provide the perfect place to grow bacteria.
The Power of Polident
Sometimes your blender blades will still be dirty after thoroughly washing the jar. That’s when you need to unscrew the blades to clean them separately. Washing the blades by hand often does the trick with just a little dish soap and hot water. And maybe a little scrubbing with a sponge or a toothbrush.
But if the blades are extremely dirty and don’t respond to your best handwashing efforts, use the power of Polident. Polident cleaners may have been created to clean dentures, but they do a great job cleaning your blender blades! You can easily find them in any drugstore or grocery store.
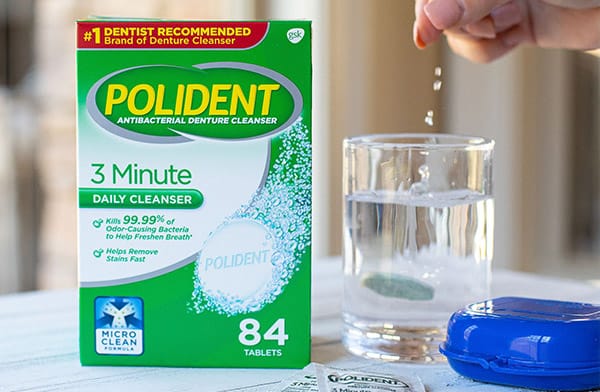
Put the jar base in a container with enough hot water to cover the base and drop in one or two tablets of Polident. Let the mixture soak for at least half an hour.
While the base is soaking, take care of the rubber ring that sits at the bottom of the jar base. It’s called a gasket and needs to occasionally be moisturized with vegetable or olive oil to make sure it stays flexible.
Some blender designs don’t let you separate the jar from the blades, but that doesn’t mean you can’t clean your blades well. Just pour in enough hot water to cover the blades and drop in one or two denture cleaning tablets. Let the mixture soak for about 30 minutes before thoroughly rinsing with warm water.
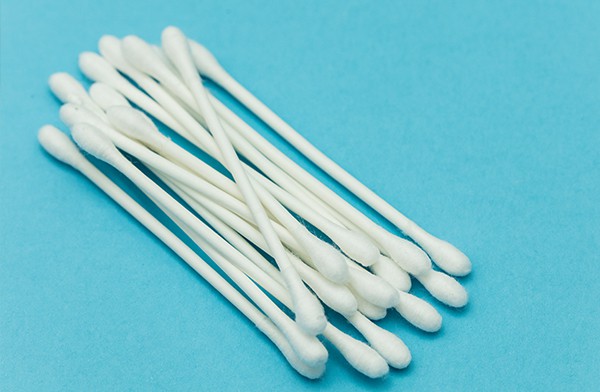
Q-Tips Are For the Kitchen Too
When it comes to cleaning the electric base, make sure to unplug the blender before you start to clean. And never immerse your blender base in water. The base contains the motor and control system, and soaking it in water is a good way to turn the blender into an expensive doorstop.
A warm, soapy dish sponge or cloth is all you need for most cleaning. First, wring the sponge or cloth until it’s damp, and then wipe off spills and caked-on fruit or vegetables. Cleaning spills as they happen saves your elbow wear and tear as these stains can become harder to remove the longer they’ve had to sit in place.
While doctors constantly tell us not to use Q-tips for our inner ears, these handy tools are perfect for getting between crevices and buttons on your smoothie blender. When there’s a build-up of gunk around the control buttons, rubbing a Q-tip dipped in rubbing alcohol can work wonders.
The rubbing alcohol dries quickly, and once your base is clean, you’ll want to use a clean, dry dishtowel to thoroughly dry any remaining damp spots.
Remember at the beginning of this post, I talked about the “frothy residue” you may find after you’ve made your smoothie? The insoluble fibers left behind? Here are a few bonus tips on how to deal with this:
- Stir. Every bit of this froth is nutritious and good for you, so I just stir my drink, making the foam less noticeable. Drink on.
- If stirring the froth through your drink doesn’t work for you, try this trick: trap the froth with a rubber spatula and pour the clear liquid beneath the foam.
- Use frozen insoluble fiber fruits and greens. Keep buying fresh produce, but cut up and store the pieces in your freezer until you’re ready to use them. The freezing seems to cut down on the amount of froth created by blending.
- Use more soluble fiber fruits and greens. This will also give you a more creamy texture. Soluble fiber fruits include avocados, bananas, broccoli, pears, mangos, nectarines, apricots, carrots, and kiwis.
Now that your smoothie blender is as clean as the day you bought it, and you know the best tips and tricks to keep it that way, you’re ready to make more smoothies. And if you’re ready to change your relationship with food, you’re at the right place.
If you’re looking for a solid eating plan that uses the deliciousness of smoothies to help you lose or maintain weight, check out the Smoothie Diet. This diet includes a three-day detox plan complete with shopping lists, recipes, and more.
Is it easy? Yes. Simple? That too. And totally flexible.
Are you having trouble cleaning your blender? Do you have any other tricks or tips to keep your smoothie blender clean? Please feel free to let me know — I’d love to get a conversation started on the subject!